How to make Roman pinsa

There Roman pinsa It's much more than just a pizza: it's a symbol of tradition, innovation, and flavor, conquering palates all over the world.
Announcements
This ancient dish, rediscovered and perfected in recent decades, combines the lightness of a long-leavened dough with the crunchiness that makes it irresistible.
But what makes the Roman pinsa What's so special about it? It's its history, the choice of ingredients, and a technique that requires patience and care.
In this article, I will guide you step by step to create a Roman pinsa authentic at home, with practical advice, original examples, and secrets from real master pizza chefs.
Get ready to transform your kitchen into a flavor laboratory!
Announcements
There Roman pinsa It was born as an evolution of an ancient bread, already consumed by the ancient Romans, and its name derives from the Latin to pin, or “to crush” or “to roll out”.
Today, thanks to a gastronomic revival, it has become a star of Italian cuisine, appreciated for its digestibility and versatility.
According to a report by Food Service Vision of 2024, the Roman pinsa It has seen growth of 15% on the menus of Italian restaurants, becoming an increasingly popular alternative to traditional pizza.
This success is no coincidence: the dough, made with a mix of flours and a long leavening process, guarantees a unique texture, crunchy on the outside and soft on the inside.
But how can you replicate this masterpiece at home? Let's find out together, with a practical and creative approach.
Why you should learn to do the Roman pinsa?
It's not just a question of taste, but also of health and creativity.
Its lightness makes it suitable for those looking for a tasty but not heavy dish, while the possibility of customizing it with fresh ingredients stimulates the imagination.
Imagine a blank canvas: the Roman pinsa it's your masterpiece, ready to be painted with flavors and colors.
In this guide, I'll reveal every detail, from the right flours to perfect baking, with practical examples and a table to organize the process.
Get ready to impress your guests with a dish that combines tradition and modernity!
The history of Roman pinsa: a journey through time
The origins of the Roman pinsa are rooted in the peasant traditions of ancient Rome.
She expanded the bread with spelt, barley, and wheat flours, then flattened it into oval loaves. This simple food was nutritious and easily transportable, perfect for farm workers.
There Roman pinsa Modern, however, it is a refined evolution, made famous in the 2000s by Corrado Di Marco, who perfected the recipe with a mix of flours (wheat, soy and rice) and a leavening of at least 24 hours.
This process isn't just a fad: the long leavening reduces yeast, making the dough more digestible.
Today, the Roman pinsa It is a symbol of balance between past and present, a bridge between peasant cuisine and modern needs.
Every bite tells a story of simplicity and care, which you can recreate at home with a little dedication.
Learn to do the Roman pinsa It also means connecting with a tradition that values local, quality ingredients.
It's an invitation to slow down, to respect the rising time, and to celebrate the beauty of handmade food. It's not just a dish, but an experience that engages the senses and the heart.
The perfect ingredients for an authentic Roman pinsa
Create a Roman pinsa It requires quality ingredients and a specific flour mix. The base is a combination of soft wheat flour (70-80%), soy flour (10-20%), and rice flour (5-10%).
These proportions guarantee lightness and crunchiness.
The water must be cold, about 60% compared to the weight of the flour, to avoid a dough that is too hot.
Use dry yeast (0.5-11 tbsp of the flour weight) and sea salt (2 tbsp). A drizzle of extra virgin olive oil adds flavor and softness.
See also: Four cheese pizza
For toppings, choose fresh ingredients: fior di latte mozzarella, cherry tomatoes, arugula, or quality cured meats.
An original example? Try one Roman pinsa with pumpkin cream, gorgonzola and walnuts: a balance of sweetness, saltiness and crunchiness.
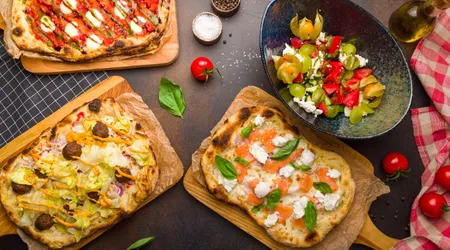
Or, for a summery touch, garnish with burrata, confit cherry tomatoes, and fresh basil. The key is simplicity: just a few ingredients, but of the highest quality.
Avoid generic flours or chemical yeasts: they compromise digestibility and flavor. Investing in excellent raw materials is the first step to a professional result.
There Roman pinsa It's like a good wine: every detail counts to enhance its character.
The step-by-step process: kneading and leavening
To prepare the dough Roman pinsa, start by mixing the flours in a large bowl.
Dissolve the yeast in cold water and gradually add it, stirring with a spoon. Add salt and oil, then knead by hand for 8-10 minutes until the dough is smooth.
Cover the dough and let it rest at room temperature for 24-48 hours. The long leavening is the secret to lightness: don't rush!
Divide the dough into 200-250g loaves, let them rest for another 2 hours, then roll them out into oval shapes on a greased baking sheet.
A pro trick? Use your fingers to create small dimples on the surface: this helps create a crispy crust.
If you want an even more authentic result, heat the oven to maximum (250-300°C) with a refractory stone. Roman pinsa cooks in 10-12 minutes.
Patience and precision are essential. A well-leavened dough is like a symphony: every note (or hour of rest) contributes to the final harmony.
Don't underestimate the power of time in your kitchen!
Table: Times and proportions for a perfect Roman pinsa
| Phase | Details | Time |
|---|---|---|
| Mixing flours | 70% wheat, 20% soy, 10% rice | 5 minutes |
| Dough | Water (60%), yeast (0.5%), salt (2%) | 10 minutes |
| Leavening | Room temperature | 24-48 hours |
| Resting the loaves | Form 200-250 g loaves | 2 hours |
| Cooking | Oven at 250-300°C, refractory stone | 10-12 minutes |
Cooking and presentation: the finishing touch
Cooking is the crucial moment for a Roman pinsa Perfect. Preheat the oven to 250-300°C, preferably with a baking stone to simulate a wood-fired oven.
Lightly grease the surface of the dough and bake for 8-10 minutes, until the edges are golden.
Add the main toppings (mozzarella, tomato) halfway through cooking to prevent them from drying out.
After cooking, top with fresh ingredients like arugula or prosciutto. Serve immediately to enjoy the crunch.
For an original example, try a Roman pinsa with pistachio pesto, stracciatella, and chopped pistachios: an explosion of Sicilian flavors.
Or, experiment with porcini mushrooms and truffle shavings for a gourmet touch. Presentation matters: use white ceramic plates to enhance the colors.
Don't overload with ingredients: the Roman pinsa shines in its simplicity.
A well-executed dish is the culmination of all your hard work. Are you ready to bring a masterpiece to the table?
Personalization and Trends 2025: The Pinsa of the Future
In 2025, the Roman pinsa It evolves with new trends. Consumers are looking for sustainable and healthy options, such as whole-wheat or gluten-free dough.
Vegan toppings, such as hummus and grilled vegetables, are increasingly popular.
An interesting fact?
Second The Fork (2024), the 68% of Italian restaurants introduced vegetarian versions of the Roman pinsa to meet growing demand.
Experiment with local ingredients: a pinsa with Apulian burrata and Pachino cherry tomatoes celebrates the region.
For a modern twist, try a Roman pinsa with smoked salmon, avocado and chia seeds: fresh and nutritious.
Or, dare with a sweet version, with hazelnut cream and fresh strawberries. Roman pinsa It's versatile: let your creativity run wild.
The future of the Roman pinsa It's inclusive and innovative. What will your next creation be? Experiment, but always respect the tradition that makes this dish unique.
Frequently Asked Questions (FAQ)
1. Can I use a domestic oven for pinsa romana?
Yes, a domestic oven is fine, but preheat it to maximum (250-300°C) and use a baking stone for best results.
2. How do I store Roman pinsa?
Store in the refrigerator for 1-2 days, wrapped in plastic wrap. Reheat in the oven at 200°C for 5 minutes before serving.
3. Can I freeze the dough?
Yes, shape the dough into loaves, wrap them in plastic wrap, and freeze them. Thaw them in the refrigerator for 12 hours before using.
4. What is the difference between pinsa and pizza?
There Roman pinsa It has a lighter dough, with a mix of flours and a long leavening time, and is crunchier and more digestible.
With this guide, you are ready to create a Roman pinsa A dish that will win everyone over. It's a journey through tradition, creativity, and authentic flavors. Enjoy your work and enjoy your meal!