Homemade bread: basic recipe

Homemade bread it is an art that combines simplicity, tradition and creativity.
Announcements
In a world dominated by industrial products, making bread at home represents a return to one's roots, an act of care and awareness.
In 2025, with rising commodity prices and a growing focus on sustainability, kneading your own bread has become a symbol of food independence.
This article will guide you step by step through the basic recipe of homemade bread, with practical advice, modern techniques and a touch of culinary poetry.
Whether you're a beginner or an experienced baker, you'll find inspiration to transform flour, water, and yeast into a fragrant masterpiece.
Announcements
Why not try to rediscover the smell of freshly baked bread?
Home baking isn't just a fad, it's a global movement.
According to a 2024 Coldiretti report, 381% of Italians have experimented with making bread at home in the last two years, driven by a desire for control over ingredients and an emotional connection with food.
This text will explore the fundamental aspects of the basic recipe, from the secrets of leavening to the mistakes to avoid, with a practical and intelligent approach.
Get ready to get your hands dirty with flour and discover the pleasure of creating your own homemade bread.
Why choose homemade bread?
Imagine the crispy sound of the crust cracking and the warm aroma filling the kitchen. Making the homemade bread it's a unique sensory experience.
It's not just about nourishing yourself, but about celebrating an ancient ritual that connects generations.
Compared to industrial bread, homemade bread allows you to select quality ingredients, avoiding preservatives and additives.
++ Apulian focaccia with cherry tomatoes
Furthermore, it is a sustainable activity. Using organic or local flour reduces the environmental impact. In 2025, with attention to the climate crisis, choosing the homemade bread it's a small gesture for the planet.
You can also experiment with ancient grains, like farro or kamut, for an authentic flavor.
Finally, it's affordable. With just a few euros of flour and yeast, you get fresh, wholesome bread.
It's an investment in your health and personal satisfaction. Have you ever thought about how rewarding it is to offer a loaf of bread you've baked yourself?
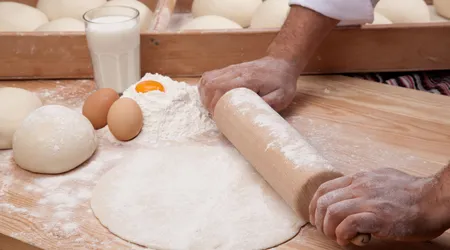
The ingredients: the basis of perfection
The recipe of the homemade bread It requires few ingredients, but quality makes all the difference. Use durum wheat or type 1 flour for a rustic texture.
The water must be lukewarm, never too hot, so as not to kill the yeast.
Yeast can be fresh, dry, or natural (sourdough). Sourdough imparts a complex flavor, but requires patience. Finally, salt enhances the flavor: use whole sea salt.
| Ingredient | Amount | Notes |
|---|---|---|
| Flour | 500 g | Type 1 or durum wheat |
| Waterfall | 350 ml | Warm (about 25°C) |
| Yeast | 10 g fresh | Or 3 g dry |
| Salt | 10 g | Whole sea bass |
Choose organic ingredients for a superior result. Local flour, for example, supports small producers and guarantees freshness.
Measure accurately: a digital scale is your best ally. Avoid improvising, especially if you're a beginner.
See also: How to make Neapolitan pizza at home
The technique: knead with love
Kneading is the heart of the homemade breadMix flour and water, letting it rest for 30 minutes (autolyse). This improves the dough's elasticity.
Add yeast and salt, then knead for 10 minutes until you get a smooth dough.
Use the "slap and fold" method for a well-oxygenated dough: lift and tap the dough on the counter. It's laborious but effective. Don't add extra flour, even if the dough seems sticky.
Practical example: for a rustic bread, vigorously knead a mixture of type 1 flour and 10% rye flour. You'll get a fluffy crumb and a crispy crust.
Patience is key. Good dough takes time and dedication. Don't rush: the results will be worth it.
Leavening: the moment of magic
Leavening transforms a lifeless dough into a living bread. Cover the dough and let it rest at 24-26°C (75-79°F) for 8-12 hours. Use a clear container to monitor the volume.
For faster rising, increase the yeast slightly, but don't overdo it: too much will alter the flavor. Sourdough starter, on the other hand, requires 12-18 hours but imparts a unique aroma.
A modern trick? Use a preheated cast iron pot to cook. It creates a wood-fired oven effect, perfect for homemade bread. Try it!
Avoid drafts and temperature changes. A slow, controlled leavening ensures a soft crumb and a golden crust.
Cooking: the grand finale
Preheat the oven to 250°C (480°F) using a baking stone or baking sheet. Create steam by spraying water or adding a small pan of boiling water. Score the surface of the bread.
Bake for 40-50 minutes, reducing the temperature to 220°C after 20 minutes. The bread is ready when the crust is golden brown and it sounds hollow when tapped. Let it cool on a wire rack.
Original example: Try baking a bread with flaxseed and sesame seeds. The crispy crust and toasted flavor will win everyone over.
Don't open the oven during baking. Steam is essential for a perfect crust. Be patient and enjoy the wait.
Mistakes to Avoid: Learn from Failures
Bread that's too dense? Maybe you used too much flour or didn't knead enough. A soft crust? The oven lacked steam. Every mistake is a lesson.
Don't shorten the rising time. An under-prepared dough will collapse during baking. Use a thermometer to check the water temperature.
Too many deep cuts ruin the shape. Make clean, shallow cuts with a sharp blade. Practice makes perfect.
Analogy: Baking bread is like writing a novel. Every detail counts, and only with patience can you create a work of art.
Customizations: make your bread unique

Experiment with alternative flours, like spelt or whole wheat, for a more intense flavor. Add olives, walnuts, or herbs for a creative twist.
In 2025, the trend is ancient grain bread. Einkorn, for example, is nutritious and sustainable. Mix 20% einkorn flour to try it.
Create original shapes: braids, slippers, or round loaves. Use molds for a professional look. Bread is also aesthetic.
Don't overdo it with extra ingredients. Too much oil or seeds can make the dough heavy. Balance flavors and textures.
Bread as a way of life
Do the homemade bread It's more than a recipe: it's a way of life. Connecting with food, slowing down, appreciating natural processes. It's an antidote to the frenzy of modern life.
Share your bread with friends and family. A loaf of bread shared together creates unforgettable moments. It's an act of love and generosity.
Start with the basic recipe, then go bold. Try brown bread, sourdough, or focaccia. Every loaf tells a story.
In 2025, with technology at the service of tradition, use apps like BreadBot to calculate rising times. But don't forget your instincts.
Conclusion: the scent of tradition
Prepare the homemade bread It's a journey that unites hands, heart, and mind. It's an accessible art, requiring only patience and curiosity.
In 2025, as the world races, kneading becomes an act of resistance, a way to rediscover authenticity.
With this basic recipe, you have everything you need to get started: simple ingredients, proven techniques, and a pinch of creativity.
There's nothing more satisfying than the smell of a freshly baked loaf of bread. So, what are you waiting for? Turn on the oven, grab the flour, and create your masterpiece.
Your homemade bread It will be more than just food: it will be a story of tradition, care, and passion.
Frequently Asked Questions
1. How long does it take to make homemade bread?
It depends on the yeast. With brewer's yeast, about 4-6 hours; with sourdough starter, up to 24 hours.
2. Can I use whole wheat flour for the basic recipe?
Yes, but add more water (about 400 ml per 500 g of flour) because wholemeal flour absorbs more.
3. Why doesn't my bread have a crispy crust?
The oven probably lacks steam. Use a small pan of water or spray it with water before baking.
4. Can I freeze homemade bread?
Absolutely! Cool completely, wrap in plastic wrap, and freeze. Thaw at room temperature and reheat to revive the crust.
5. What is the best yeast for beginners?
Dry yeast is easy to use and guarantees consistent results. Start with it!